If you’re dreaming of a fun, cozy treat that brings the magic of the holidays right into your kitchen, this Delicious Festive Pink Velvet Cake Recipe is your new go-to. Perfect for celebrations or whenever you want to impress with something vibrant and flavorful, this cake is as delightful to make as it is to eat. You’ll love how the gorgeous pink layers and delicate cream cheese frosting come together effortlessly, making each bite a festive little celebration.
Jump to:
Why You’ll Love This Delicious Festive Pink Velvet Cake Recipe
From the moment you slice into this cake, the soft pink crumb and luscious cream cheese frosting tell a story of celebration and care. It’s not just a showstopper, but one that’s surprisingly easy to bring together, even if you’re a casual baker. Whether for a birthday, holiday party, or just a special weekend treat, this cake brings warmth, sweetness, and a pop of cheerful color that everyone will admire and savor.
- Texture you want: Moist, tender crumb that melts in your mouth without being heavy
- Flavor that pops: A perfect balance of mild cocoa and vanilla with a tangy cream cheese frosting
- Everyday ingredients: You probably already have most of what you need in your pantry!
- Works for any night: Great for impressing guests or treating yourself when you need a little color and sweetness

Ingredient Spotlight
For a truly delicious festive pink velvet cake, choosing the right ingredients is key. I'll share a few tips on what I use and how you can swap out a few things without losing any of that classic flavor and texture you’re aiming for.
- Cocoa powder: Use natural unsweetened cocoa for that subtle chocolate hint without bitterness.
- Buttermilk: It’s essential for tender crumb and tangy flavor; if needed, make a quick substitute with milk and vinegar.
- Red food coloring: Gel-based colors work best for vibrant pink without watering down the batter.
Seasonality & Sourcing
You can find all these ingredients year-round in most grocery stores, but if you’re going for that naturally festive vibe, look for organic or high-quality cocoa and fresh buttermilk to get the best flavor. Around the holidays, specialty baking shops might stock gourmet cream cheese or seasonal colorings that elevate your pink velvet cake to next-level deliciousness, but the basic ingredients are reliable anytime.
Step-by-Step: How to Make It
Delicious Festive Pink Velvet Cake Recipe — Step 1 — Prep & Preheat
Start by preheating your oven to 350°F (175°C). Grease and flour two 8-inch round cake pans, or line them with parchment paper for an easy release. While the oven warms up, sift together your dry ingredients—flour, cocoa, baking soda, and salt—to avoid any lumps. A common slip is forgetting to properly prepare your pans, which can cause your cake to stick and break, so take a moment here—it pays off in clean slices later!
Step 2 — Cook & Build Flavor
Next, cream your butter and sugar until light and fluffy; you'll see it turn pale and smell wonderfully sweet. Then, add eggs one at a time, mixing well after each. Alternate adding your dry mix with buttermilk and the red food coloring until smooth and evenly pink. Pour batter into your prepared pans and bake for about 28-32 minutes. Check doneness by inserting a toothpick—it should come out clean or with a few moist crumbs, not wet batter. If slightly underbaked, give it a few more minutes, but watch closely to avoid dryness.
Step 3 — Finish & Rest
Let your cakes cool in the pans for 10 minutes before turning them out onto wire racks to cool completely. This step is crucial because frosting warm cake can make it slip and slide. While they cool, whip up your cream cheese frosting—the tanginess beautifully complements the cake’s sweetness. Frost your layers once fully cooled, and if you have the patience, chill the finished cake for an hour; this helps the frosting set nicely and makes slicing tidier.
Troubleshooting Delicious Festive Pink Velvet Cake Recipe
If your cake ends up dry, next time watch baking time closely and consider adding an extra tablespoon of buttermilk. For a bland cake, don’t shy away from more vanilla or even a pinch of espresso powder to deepen flavor. If your cake is soggy, you might be overmixing or adding too much liquid—mix gently and measure carefully for best results.
Pro Tips
Based on my kitchen trials, here are some little secrets to make your Delicious Festive Pink Velvet Cake Recipe truly shine—small tricks that make a big difference.
- Heat control: Keep your oven temperature spot-on; use an oven thermometer if unsure.
- Timing window: Don’t wait too long before frosting; slight chilling upfront helps but don’t let cakes dry out.
- Make-ahead move: Bake the layers a day in advance and wrap tightly; frosting fresh is best.
- Avoid this pitfall: Overmixing batter—it’ll toughen the crumb and dull that signature pink color.
Variations & Substitutions
Feel free to put your spin on the Delicious Festive Pink Velvet Cake Recipe. For a dairy-free version, swap buttermilk with almond milk plus lemon juice and cream cheese with a vegan alternative. Mix in fresh raspberries between layers for a natural fruit twist, or add a handful of white chocolate chips for bursts of sweetness. If you want a milder pink, reduce the food coloring or try a beet powder for a natural hue.
Great Debates
One classic debate is butter versus oil in a velvet cake. Butter offers more flavor and a rich crumb, which I prefer for the Delicious Festive Pink Velvet Cake Recipe, but oil can make the cake extra moist. It comes down to your taste and what texture you like—some folks love the lighter feel oil provides, so feel free to experiment.
Make-Ahead, Storage & Freezing
You can absolutely prepare your pink velvet cake in advance. Store it in an airtight container in the fridge for up to 4 days. If you want to freeze it, wrap cooled unfrosted cakes tightly in plastic wrap and foil, then freeze for up to 2 months. Thaw overnight in the fridge before frosting. Once frosted, keep refrigerated and bring to room temp before serving for the best flavor and texture.
Yield & Conversions
This recipe yields a two-layer 8-inch cake serving about 10-12 people. To double, simply double all ingredients and bake in two pans at once or in batches. For half, halve everything but be mindful that texture can change when scaling down small quantities. For metric fans, 1 cup of flour is roughly 120 grams; use a kitchen scale for the most reliable results.
Serving Ideas & Pairings
Serve your Delicious Festive Pink Velvet Cake Recipe with fresh berries or a drizzle of raspberry sauce to enhance the berry tones in the frosting. A dollop of lightly sweetened whipped cream adds softness without overwhelming, and a cup of chamomile tea or light rosé complements the cake’s delicate flavors beautifully—perfect for a relaxed holiday afternoon or special gathering.
FAQs
Yes! The cake will have a more muted, reddish-brown color thanks to the cocoa. You can also try natural alternatives like beet juice or powder for a subtle pink hue.
Make sure your cream cheese and butter are cold but slightly softened, and don’t overbeat the frosting. If it’s too soft, chill it for 15-20 minutes, then try again.
You can substitute buttermilk by adding 1 tablespoon of vinegar or lemon juice to 1 cup of milk. Let it sit for 5 minutes before using to mimic buttermilk’s acidity.
Store leftover cake in an airtight container in the fridge for up to 4 days. Bring it to room temperature before serving to enjoy its full flavor.
Notes, Tools & Special Equipment
Use two 8-inch round cake pans for even layers, and line them with parchment paper to prevent sticking. A hand or stand mixer helps get that fluffy batter and creamy frosting, but you can whisk by hand with a bit more elbow grease. An oven thermometer is invaluable for consistent baking. Finally, a good offset spatula makes frosting application smooth and professional-looking in your Delicious Festive Pink Velvet Cake Recipe adventures.
PrintPrintable Recipe 📖
Delicious Festive Pink Velvet Cake Recipe

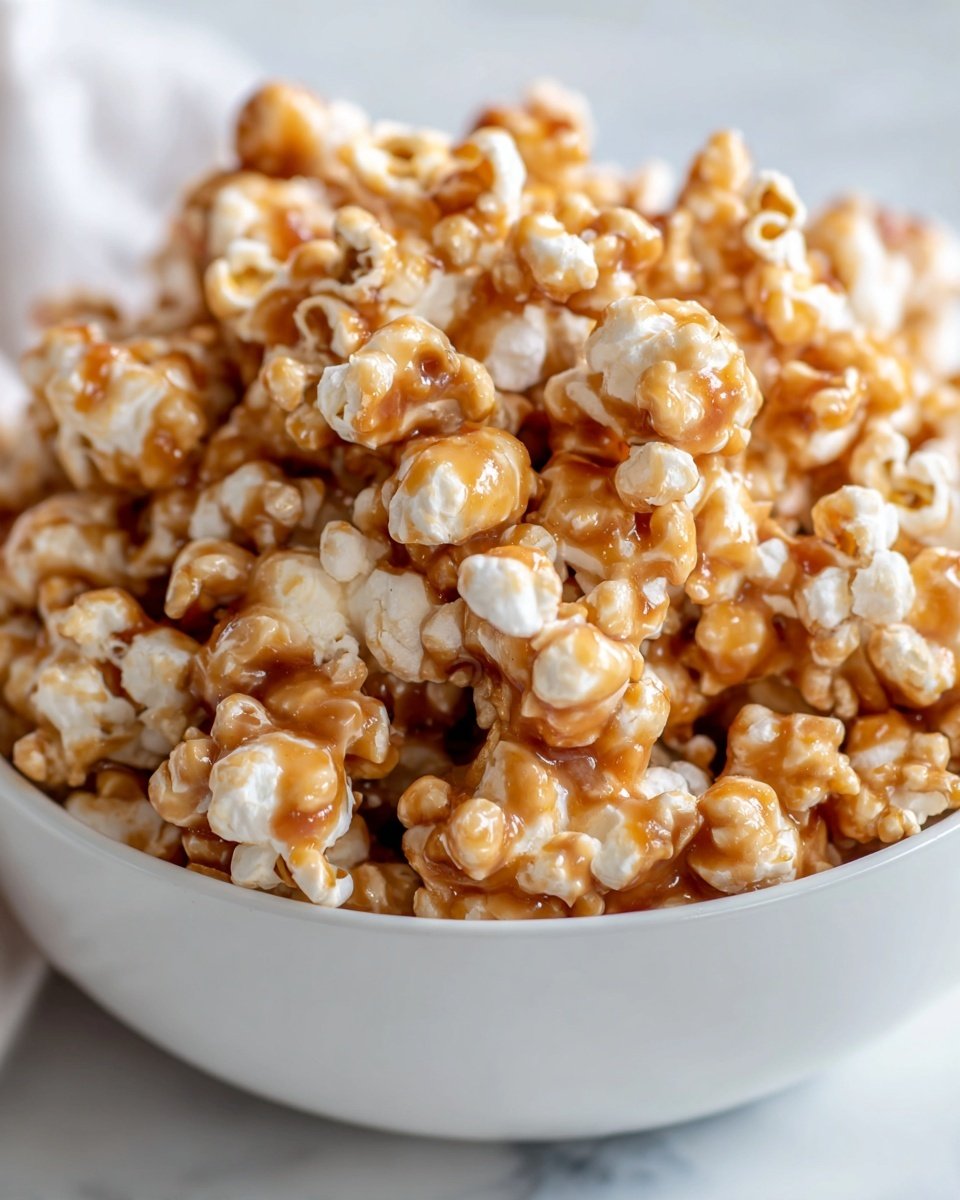
Magical Harry Potter Butterbeer Popcorn is a delightful and cozy treat perfect for movie nights. This recipe combines freshly popped popcorn with a rich, buttery butterscotch sauce, delivering the iconic flavors inspired by the beloved Butterbeer drink from the Harry Potter series. Easy to prepare and irresistibly delicious, it’s a perfect snack for fans and family gatherings.
- Prep Time: 10 minutes
- Cook Time: 10 minutes
- Total Time: 20 minutes
- Yield: 12 servings
- Category: Snack
- Method: Stovetop
- Cuisine: American
Ingredients
Popcorn
- 10-12 cups freshly popped popcorn (air-popped or microwaveable)
Butterbeer Sauce
- 1 cup unsalted butter
- 1 cup dark brown sugar
- 1 cup butterscotch chips
- ½ teaspoon baking soda
- 1 teaspoon butter extract (or vanilla extract as a substitute)
Instructions
- Pop the popcorn: Prepare 10-12 cups of popcorn by air-popping or microwaving according to package instructions. Place the popcorn in a large mixing bowl and remove any un-popped kernels.
- Make the Butterbeer sauce: In a medium saucepan over medium heat, melt 1 cup of unsalted butter. Stir in 1 cup of dark brown sugar and cook until the sugar has completely dissolved and the mixture is smooth.
- Add butterscotch chips and baking soda: Remove the saucepan from heat and immediately stir in 1 cup of butterscotch chips until fully melted and blended. Then add ½ teaspoon baking soda and 1 teaspoon butter extract. Stir well; the sauce will become frothy and lighter in color.
- Combine popcorn and sauce: Quickly pour the warm Butterbeer sauce over the popcorn and stir gently to coat every piece evenly without crushing the popcorn.
- Cool and serve: Spread the coated popcorn onto a parchment-lined baking sheet to cool and set for about 15 minutes. Once set, break into clusters and enjoy your magical treat!
Notes
- Use air-popped popcorn for the best texture and flavor absorption.
- Butter extract can be replaced with vanilla extract if you prefer a milder flavor.
- Don’t skip the baking soda as it lightens the sauce and adds the signature Butterbeer frothy texture.
- For a gluten-free treat, ensure your popcorn and butterscotch chips are certified gluten-free.
- Store leftover popcorn in an airtight container to maintain freshness.


Leave a Reply